Work with Saved Searches
Review provides the following methods for accessing and using saved searches:
-
Loading a saved search into the Advanced Search dialog box. This allows you to review search criteria and optionally revise the search to meet your current needs (often more efficient than building a complex search from scratch). In addition, you can load multiple searches to quickly create new combinations of search criteria.
-
Running saved searches from the Case Folders pane.
Saved Search Activities
-
Saving Searches
-
Running a Saved Search
-
Deleting a Saved Search or Search folder
For more information about each procedure, read through the instructions below.
 Save Searches
Users have the option of saving searches from the search list (located in the Case Folders pane) or from the Advanced Search dialog box. Additionally, users can create custom folders to store these saved searches for improved organization. Below are instructions on how to:
-
save from the search list
-
save from the Advanced Search dialog box
-
create new folders
Save Searches from the Search List
The following procedure applies to quick searches, advanced searches, and history searches, all of which appear in the Search Results list in the Case Folders pane.
-
On the Dashboard, click the Review module.

-
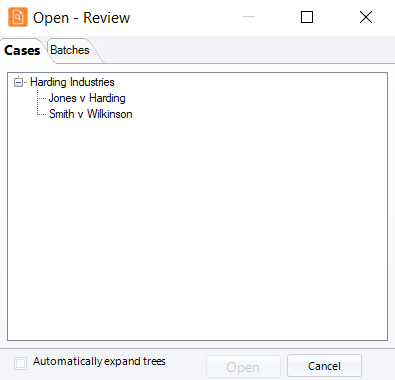
Select a Client and Case and click Open.
The Review work area displays.
- Run a quick or an advanced search. (For instructions on running a quick search, see Enter Search Expressions. For instructions on how to define and run an advanced search, see Use Advanced Search.)
-
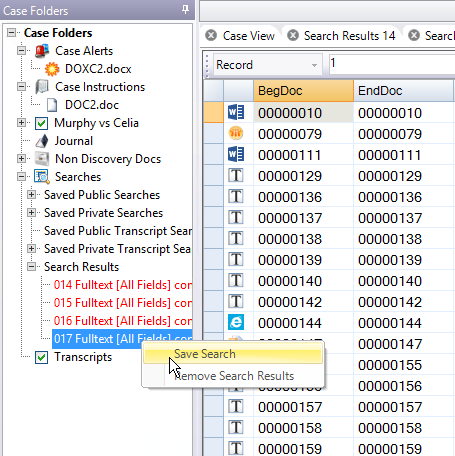
Searches you have run in your current Review session are listed in the Case Folders pane, Searches > Search Results list. In that list, locate the search to be saved.
-
Right-click the search and select Save Search.

-
Complete the Save Search dialog box and click OK. Note: If you select No Folder, the search will be saved to the root of the Saved Public or Private Searches folder.
-
To move a search into a custom folder:
-
Locate the saved search in the Case Folders pane, under the Saved Public or Private Searches folder (depending on where you saved it).
-
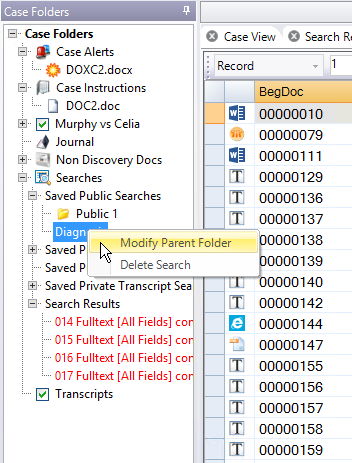
Right-click on the saved search, then select Modify Parent Folder. Public searches can be moved to public folders; private searches can be moved to private folders. (See Create Folders for instructions on how to create custom folders where you can store your saved searches.)

-
Select the needed folder and click OK.
-
-
If you saved a search for public use, communicate with your team members that the search is available.
-
To run a saved search, see Run a Saved Search.

If your search involves private tags and/or private folders, the search type must be Private.

Save Searches from the Advanced Search Dialog Box
The following procedure applies to searches defined in the Advanced Search dialog box, including advanced, history, or transcript history searches:
-
On the Dashboard, click the Review module.
-
Select a Client and Case and click Open.
The Review work area displays.
- On the main search bar, click Advanced.
-
Create a search expression. See Use Advanced Search or Execute a Search from the History List for instructions on how to create a search expression.
-
When the search is defined as desired, click Save.
-
In the Save Search dialog box:
-
Enter a name for your search. Note: Names are case-sensitive and must be unique. Public and private searches can be given the same name, however.
-
To limit the search for your personal use, select the Make this a private search option.

NOTE: Private tag and/or private folder searches must be saved as private searches.
-
Click OK. The search will be saved at the “root” of the Saved Public or Private Searches list, or the Saved Public or Private Transcript Searches list if saving a transcript search.
-
- To continue work in the Review work area, close out of the Advanced Search dialog box.
-
To move a saved search into a custom folder:
-
Locate the saved search in the Case Folders pane, under the Saved Public or Private Searches folder (depending on where you saved it).
-
Right-click on the saved search, then select Modify Parent Folder. Public searches can be moved to public folders; private searches can be moved to private folders. (See Create Folders for instructions on how to create custom folders where you can store your saved searches.)

-
Select the needed folder and click OK.
-
-
If you saved a search for public use, communicate with your team members that the search is available.
-
To run a saved search, see Run a Saved Search.
|
|
NOTE: If a previously defined search appears in the Advanced Search tab, click the Clear button at the bottom of the dialog box; do not manually change the search definition. |

Create Folders
By default, searches are saved to the “root” of the Saved Public or Private Searches folder. These folders are located in the Case Folders pane on the left side of the Review Work Area. If you want to organize your saved searches in custom folders, create them as follows:
- For best results, determine naming conventions for search folders.
-
On the Dashboard, click the Review module.
-
Select a Client and Case and click Open.
The Review work area displays.
-
In the Case Folders pane, under Searches, right-click Saved Public or Private Searches (depending on the type of folder you are creating) and select Create Folder.
NOTE: You can only create custom folders for Saved Public and Private Searches. Transcript searches must be saved to the "root" of the Saved Public or Private Transcript Searches folders.
-
Enter a name for the folder and click OK.
-
Repeat these steps to create other folders.

Run a Saved Search
To run a saved search:
-
On the Dashboard, click the Review module.
-
Select a Client and Case and click Open.
The Review work area displays.
- To run a saved search from the Advanced Search dialog box, complete step 4. To run a saved search from the Case Folders pane, skip to step 5.
-
Advanced Search:
-
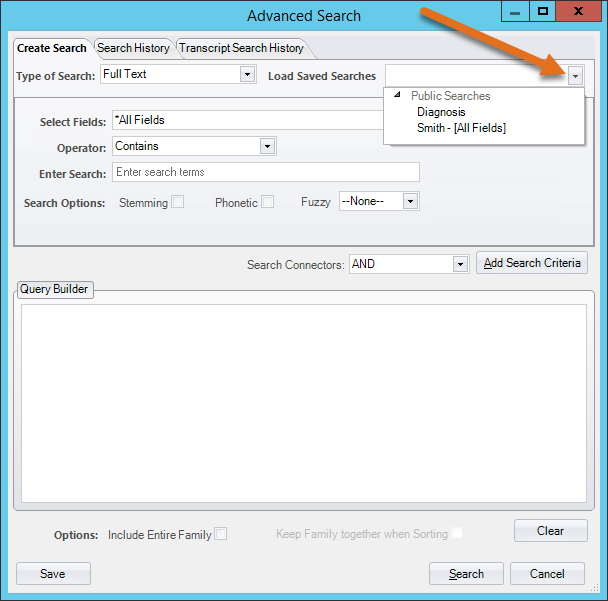
On the search bar, click Advanced.
-
In the Load Saved Searches list, select the needed search.

-
Optional: Revise the search as explained in Change an Advanced Search.
-
Click Search and skip to step 6.
-
-
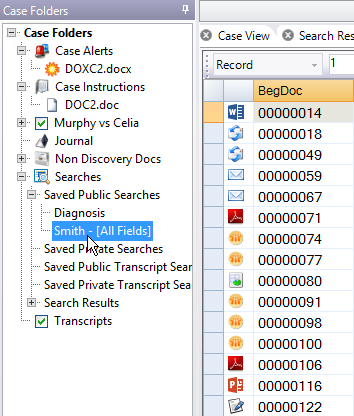
Case Folders pane: Locate and double-click the search in the Searches > Saved Public or Private Searches list, or the Saved Public or Private Transcript Searches list. The search will be executed.

-
View the resulting Search Results pane.
Delete a Saved Search or Search Folder
Users can delete any searches (public and private) or folders they have created. Super and Case Administrators can delete any saved public searches or folders.
|
|
NOTE: Deleting a folder that contains searches will delete both the folder and the searches at the same time. |
To delete a saved search or a folder:
-
On the Dashboard, click the Review module.
-
Select a Client and Case and click Open.
-
In the Case Folders pane, under Searches > Saved Public or Private Searches, complete either or both of the following steps as needed.
Note: Saved transcript search lists (found in the Case Folders pane, under Searches > Saved Public or Private Transcript Searches) do not allow users to create custom folders. If working with those lists, skip to step 5.
-
To delete a folder, right-click a search folder and select Delete Folder. Empty folders are deleted immediately; if searches reside in the folder being deleted, you have the opportunity to keep or delete the searches in the folder.

-
To delete an individual search, right-click the search and select Delete Search. The search will be deleted immediately.
Related Topics:
Version: 2023.8.12
Last Revision: 11/8/2023